
Uploading and Managing Media in Canvas Studio: Accessibility, Captions, and Copyright
Uploading and Managing Media in Canvas Studio: Accessibility, Captions, and Copyright
Media plays a central role in online learning, but it must be used thoughtfully to remain accessible and compliant. Canvas Studio provides tools to upload, manage, and enhance media for instructional use.
Learning Objectives
By the end of this chapter, you should be able to:
- Upload one or more media files to Canvas Studio.
- Identify ways to add media from a device or by drag and drop.
- Recognize upload limits and supported file considerations.
- Locate tools for managing captions, transcripts, sharing, and analytics.
- Apply accessibility and copyright considerations when using uploaded media.
Key Terms
- Canvas Studio: A media management tool in Canvas that supports uploading, storing, captioning, and sharing audio and video files.
- Transcript: A text version of spoken audio content, often created from captions and edited for accuracy.
- Caption file: A file containing timed text for spoken audio in a media recording.
- Attribution: A credit statement acknowledging the creator and license terms for reused content.
Chapter Overview
This chapter explains how to upload and manage media in Canvas Studio while maintaining accessibility and copyright compliance. You will learn how to add media from your device or external sources, monitor upload progress, and use Studio tools to organize and enhance your media.
In addition to the technical steps, this chapter emphasizes the importance of captions, transcripts, and attribution. These elements help ensure that media content is usable by all learners, including those who rely on assistive technologies.
Transcript
Working with Captions in Canvas Studio
You can generate captions within Studio or upload your own caption file.
- Select Captions.
- Choose the language spoken in the media.
- Select Request to generate captions.
- When the captions are ready, select Review and Publish.
- Edit the caption text as needed, then publish your revisions.
You can also upload your own caption file. The most common type is an SRT file, though Studio also supports VTT files. Anyone viewing the media can turn captions on by selecting the CC button in the media player.
Before You Upload Media
This process can help you obtain a caption file for creating a transcript from media. However, if you do not own the copyright to the media, you may not be permitted to upload the finished file to a course for student access. When using openly licensed media, make sure you follow the license requirements and provide attribution when needed.
Audio Files and WCAG 2.1 Level AA Compliance
To meet WCAG 2.1 Level AA standards, audio content must be accessible to all users, including those who are deaf or hard of hearing. Any pre-recorded audio-only content should be accompanied by a text transcript that accurately reflects all spoken dialogue and relevant non-speech information, such as speaker identification or sound effects.
For audio that plays automatically, users must have the ability to pause, stop, or control the volume independently of the system volume if it lasts more than three seconds.
Providing transcripts not only ensures compliance but also improves usability for a wider audience, including English language learners and users in sound-restricted environments. When possible, ensure transcripts are easy to locate, clearly labeled, and formatted for readability.
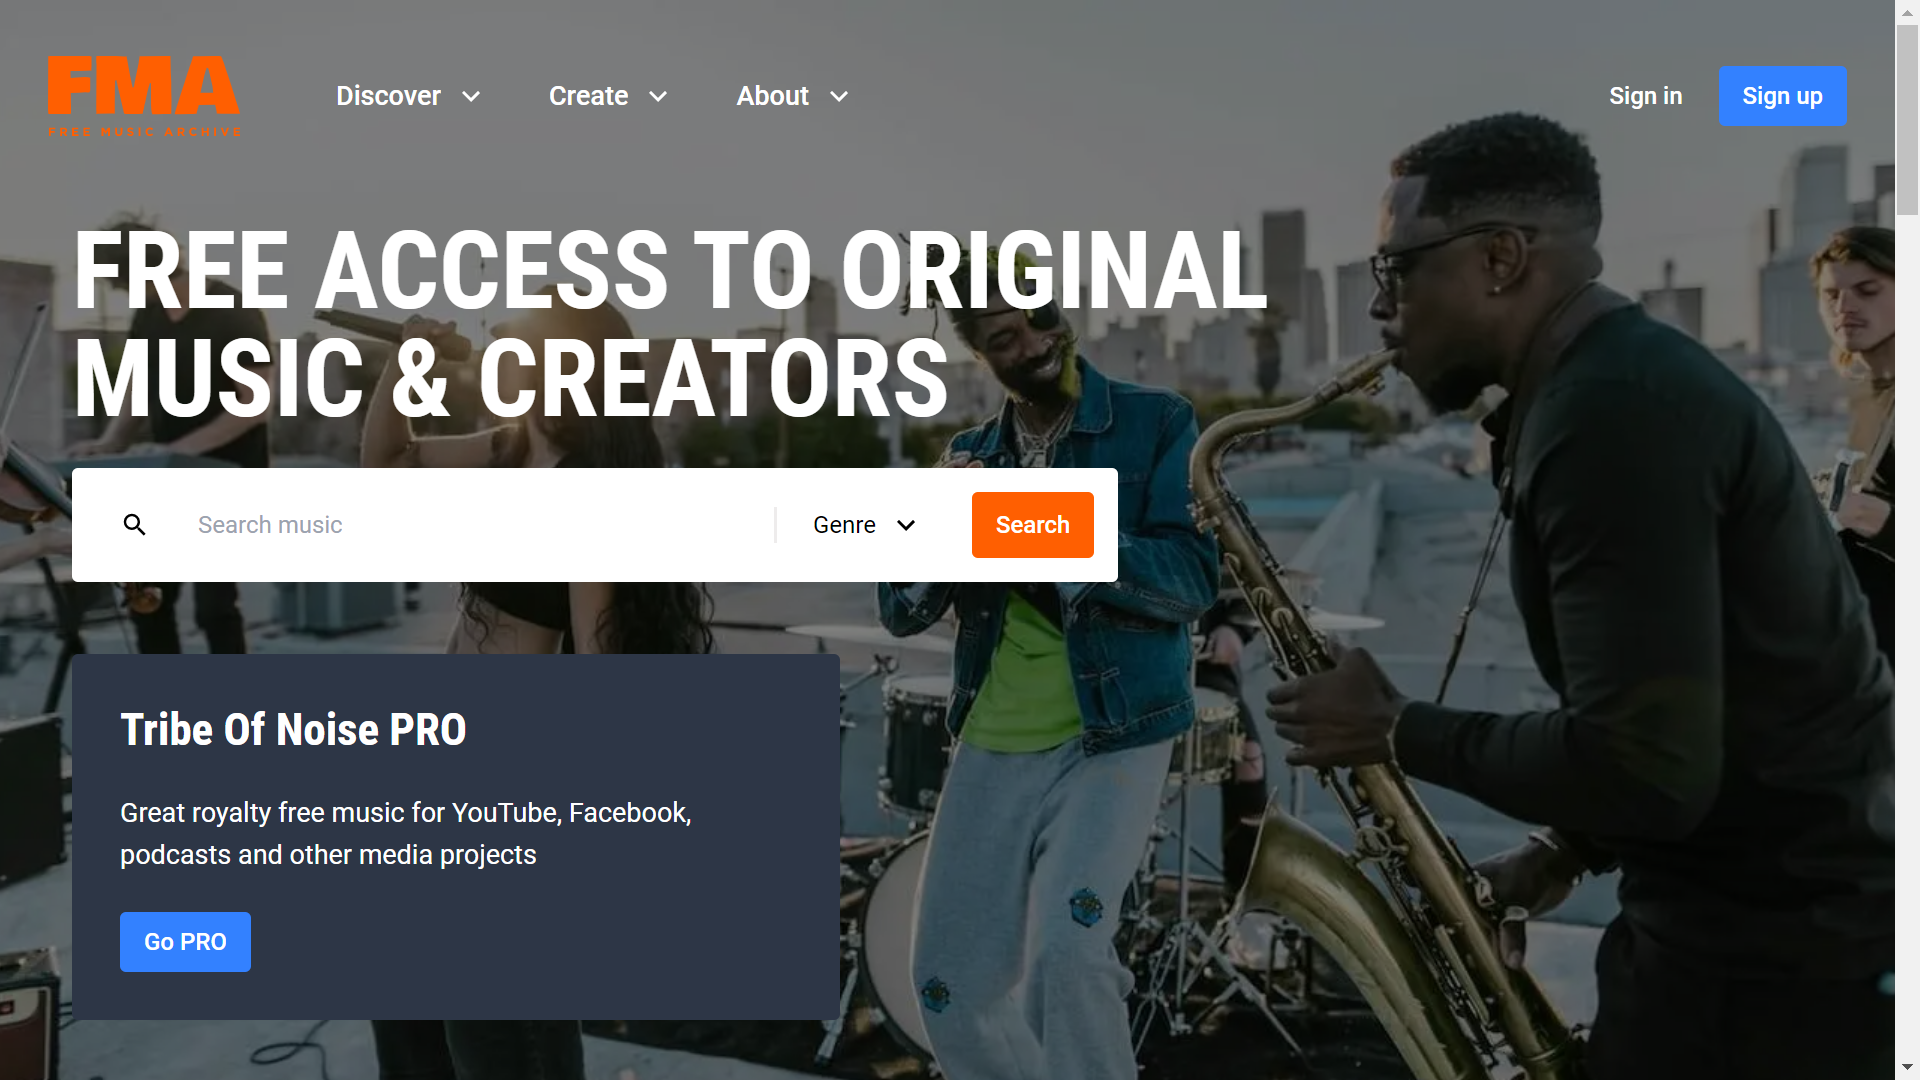
Finding and Using Open Audio Resources
You can locate free MP3 files through the Free Music Archive. For media with a Creative Commons license other than CC0 or public domain, review how to provide proper attribution for Creative Commons materials.
Copyright Reminder
Creating captions or transcripts from media does not automatically give permission to redistribute that media in a course. Confirm that you have the rights to use the media with students.
Using Canvas Studio for Media Uploads
In Canvas Studio, you can upload media files from your device by dragging and dropping files into My Library or by selecting the Add Media option. Studio supports individual file uploads and can upload multiple files at the same time. The maximum file size for a media upload is 10 GB.
Before uploading, review the supported file formats in Canvas Studio. After upload, you can add annotations to media, share media with other users, and edit media details and tags.
Canvas Studio also supports adding videos from external sources such as YouTube and Vimeo by URL.
Administrator Note
Some institutions restrict uploads from a local device. Review Canvas Studio user role permissions if upload options appear unavailable.
Step 1: Open the Upload Option
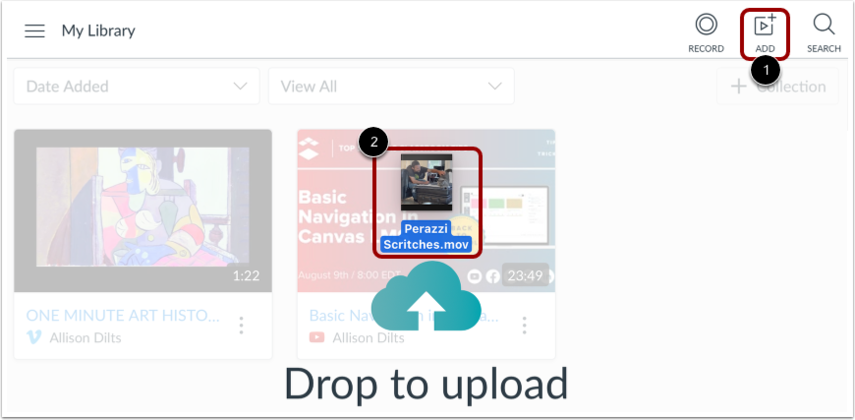
- Open Canvas Studio.
- From any Studio page, select the Add Media icon.
- As an alternative, drag and drop one or more media files into Studio.
You can upload multiple files at once, but compressed ZIP files are not supported. Be sure that each file meets the format and size requirements.
Step 2: Browse for Files
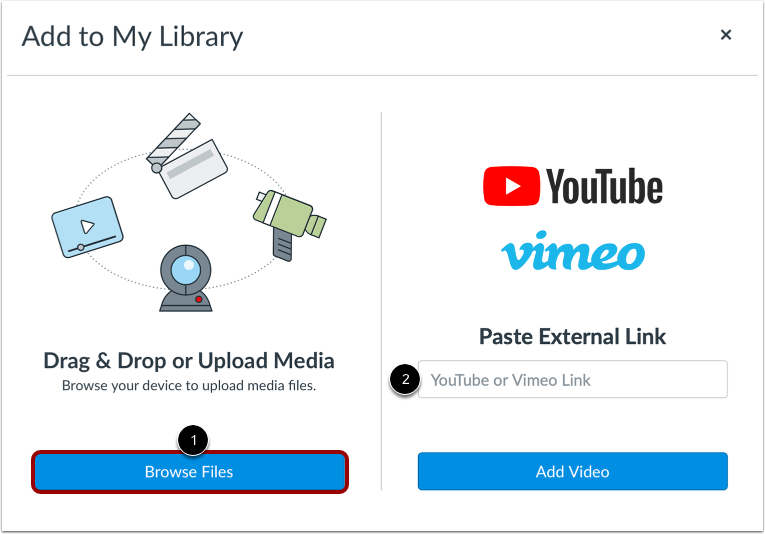
- Select Browse Files.
- Navigate to the media file on your device.
- If enabled, you may also choose to add media from a YouTube or Vimeo URL in Canvas Studio.
Step 3: Select and Upload the File
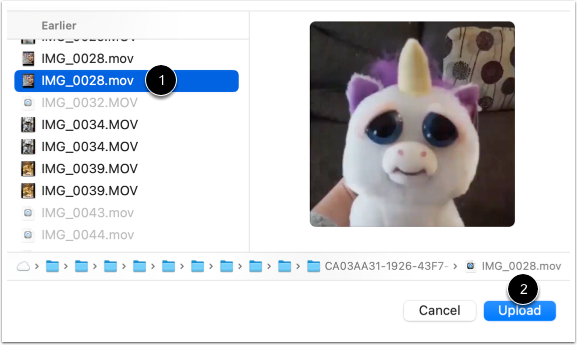
- Select the media file you want to upload.
- Choose Upload to begin the process.
Step 4: Monitor Upload Progress
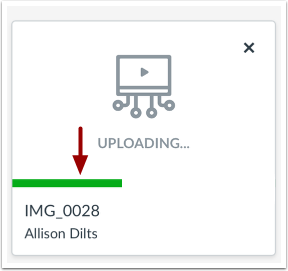
Watch the progress indicator to confirm that the upload is continuing successfully.
Step 5: View the Uploaded Media
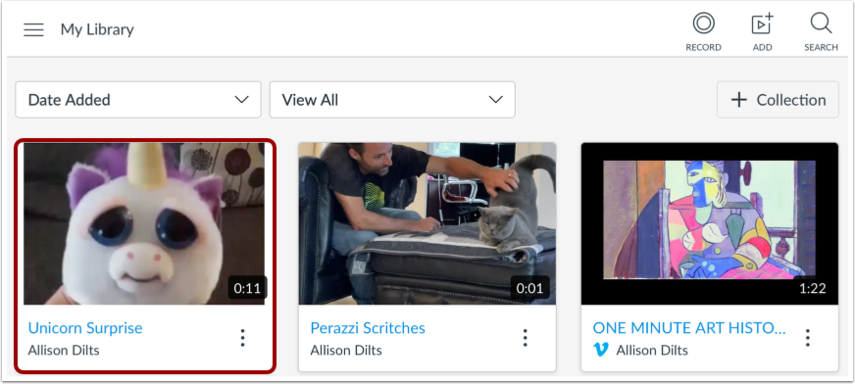
When the upload is complete, the media appears on your My Library page. Select the item to open and review it.
Step 6: Manage Media Settings and Accessibility Features
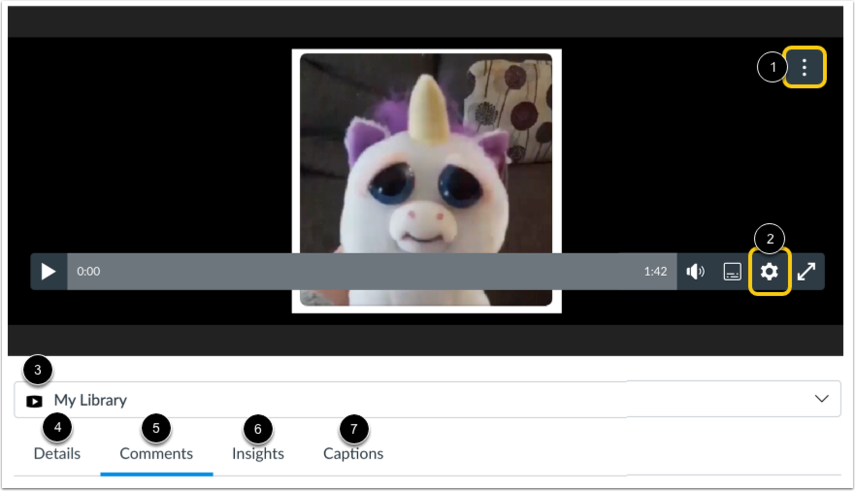
From the media details page, you can share media in Canvas Studio, download the media, download a transcript when available, or delete media from Canvas Studio using the More Options menu.
You can also manage playback settings, turn commenting on or off, view media locations, edit media details and tags, review comments, examine user insights and analytics, and upload a caption file to media in Canvas Studio.
Accessibility Tip
If transcript download is available, review the text for punctuation, spelling, speaker clarity, and formatting before sharing it with students. For course materials, place the transcript below the audio or video item so learners can access it easily.
Transcript and Heading Guidance
To download a transcript of the media, captioning must be enabled by the owner of the media. After downloading, edit the transcript for accuracy. When preparing the transcript document for course use, use a clear title and appropriate heading structure so the transcript is easy to navigate.
Accessibility Check
- Confirm that media used in your course has the appropriate copyright permissions.
- Provide attribution for Creative Commons licensed content when required.
- Add captions to audio and video when possible.
- Review generated transcripts for accuracy before publishing.
- Use meaningful link text instead of pasting raw URLs into chapter content.
- Place transcripts near the related media so students can locate them easily.
Chapter Summary
Canvas Studio supports uploading media from your device, monitoring upload progress, and managing media after it is processed. It also provides tools for sharing, editing, captioning, and reviewing media analytics. Accessible use of Studio includes captioning media, improving transcript quality, and following copyright and attribution requirements.
Key Takeaways
- Canvas Studio supports device uploads, drag-and-drop uploads, and some URL-based media additions.
- The maximum upload size for a media file is 10 GB.
- Multiple files can be uploaded at once, but ZIP files are not supported.
- Studio includes tools for sharing, editing, analytics, and captions.
- Captions, transcripts, and attribution are essential parts of accessible media use.
Review Questions
- What are two ways to upload media into Canvas Studio?
- Why is it important to verify copyright permissions before sharing uploaded media with students?
- What accessibility benefits come from adding captions and transcripts?
- What types of media management options are available after upload?
- Why should transcripts be reviewed before they are shared in a course?
Practice Activity
Upload a short media file to Canvas Studio or review an existing media item in your library. Check whether captions are available, download the transcript if possible, edit the transcript for readability, and identify where you would place the transcript in a Canvas course page for easy student access.
Further Reading
- How to upload media files in Canvas Studio, Canvas LMS Community
- Supported file formats in Canvas Studio, Canvas LMS Community
- How to upload a caption file to Canvas Studio media, Canvas LMS Community
Licenses and Attribution
CC Licensed Content, Original
This educational material includes AI-generated content from ChatGPT by OpenAI. The original content created by Josh Hill, Neida Abraham, and Emiliana Olavarrieta from Hillsborough College is licensed under a Creative Commons Attribution-NonCommercial 4.0 International License (CC BY-NC 4.0).
All images in this textbook generated with DALL·E are licensed under the terms provided by OpenAI, allowing their use, modification, and distribution with appropriate attribution.
Third-Party Platforms and Interfaces
This chapter includes screenshots of third-party software and web interfaces, including Canvas Studio and the Free Music Archive website, for purposes of instruction, commentary, and accessibility training. These screenshots are used to document a workflow and remain subject to the terms, policies, and rights associated with the respective platforms.
Standards and Guidance
This chapter discusses media uploads, captioning, transcript review, attribution, and permissions in Canvas Studio and refers readers to Canvas Studio guidance and Creative Commons attribution guidance.
References
- Canvas LMS Community. (n.d.). How do I upload media files in my Canvas Studio account?
- Canvas LMS Community. (n.d.). What file formats does Canvas Studio support?
- Canvas LMS Community. (n.d.). How do I upload a caption file to Canvas Studio media?
- Creative Commons. (n.d.). Attribution.
- Free Music Archive. (n.d.). Free Music Archive.
- OpenAI. (2022, November 30). Introducing ChatGPT.
Other Licensed Content
Canvas Studio: Captioning
How to Canvas
License: Standard YouTube License.
